

I wish, I mean I wish, I looked good wearing long, fun and trendy neckalces. They do so much for a simple solid t-shirt or sweater. And God knows I have plenty of those. For whatever reason long necklaces just don't look right on me. But my sister? Well she's a different story. They look great on her, she wears them all the time and of course, she has quite the collection.
Every year for Christmas and her birthday Marissa wants the same things - necklaces and purses. Well, I'm bored of all that. So this year I asked her to come up with something a little more creative. She asked for a necklace holder. Way to really step out and try something new, Marissa.
Anyway, she wanted something that could fill a space on her bathroom wall and could hold around 15-20 necklaces. Her bathroom is done in brown and silvers with accents of Tiffany blue. Immediately, I decided that I was not going to be gifting her any regular necklace holder. No, I was going to make it.
So, I hopped on Pinterest, did a few google searches and found a whole lot of nothing. Surprising, I know. But I did get some inspiration and an idea started to form. The next day I headed to Home Depot and started collecting supplies. I found a nice little man who helped me track down the perfect pieces of wood and even cut the main piece down to size. Gotta love those cute old men at Home Depot.
So, without further ado, here's how TC and I made the necklace holder.

Basic supplies were from Home Depot: pine board cut down to 18 inches ($3), Caribbean Blue spray paint ($5), dark walnut wood stain ($5) and six cabinet door knobs.

Oh, and a piece of molding. Choose wisely here. Molding comes in different widths, tons of different patterns and a wide price range. I thought the squares would be a nice contrast to the round cabinet knobs and they were well defined and would show paint/stain well.

A word on cabinet knobs: they will make or break your budget. This could have easily been a $10 project or a $70 project. It all depends on the knobs you choose. The prices vary as do the styles. My most expensive one was $7.00 and the least expensive was around $2.00.

Because the nice man at Home Depot cut the board down for me, our first order of business was to cut down the molding. I bet if I had been really nice to the Home Depot guy he would have done this part too. Instead, TC took care of this while I arranged and rearranged the order of the cabinet knobs. And took photos.

The trick here was to cut molding at a 45* angle.

And try not to loose a finger.
It would really make a mess.

The squares didn't line up perfectly but try to put your OCD aside and move on. There are more important things to do. Like rearrange the order of the cabinet knobs again.

Next up, we took into account the width of the molding and then divided down the remaining space by the amount of knobs we were using. Clearly, I'm really good at math and measuring, as seen by my eight million pencil marks.

After a few false starts, I got the measurements even and then finally let TC drill holes in the proper spots. Because the cabinet knobs will be placed in the holes and then screwed on in the back (just like they are in a regular cabinet door) we had to make sure we used a drill bit the same size as the screw.

With all that done, it was time to paint. Paint the board, paint the paper, paint the grass...

Paint my hand...ya know, the usual.
I figured while I had blue hands I might as well turn them brown while I was at it.

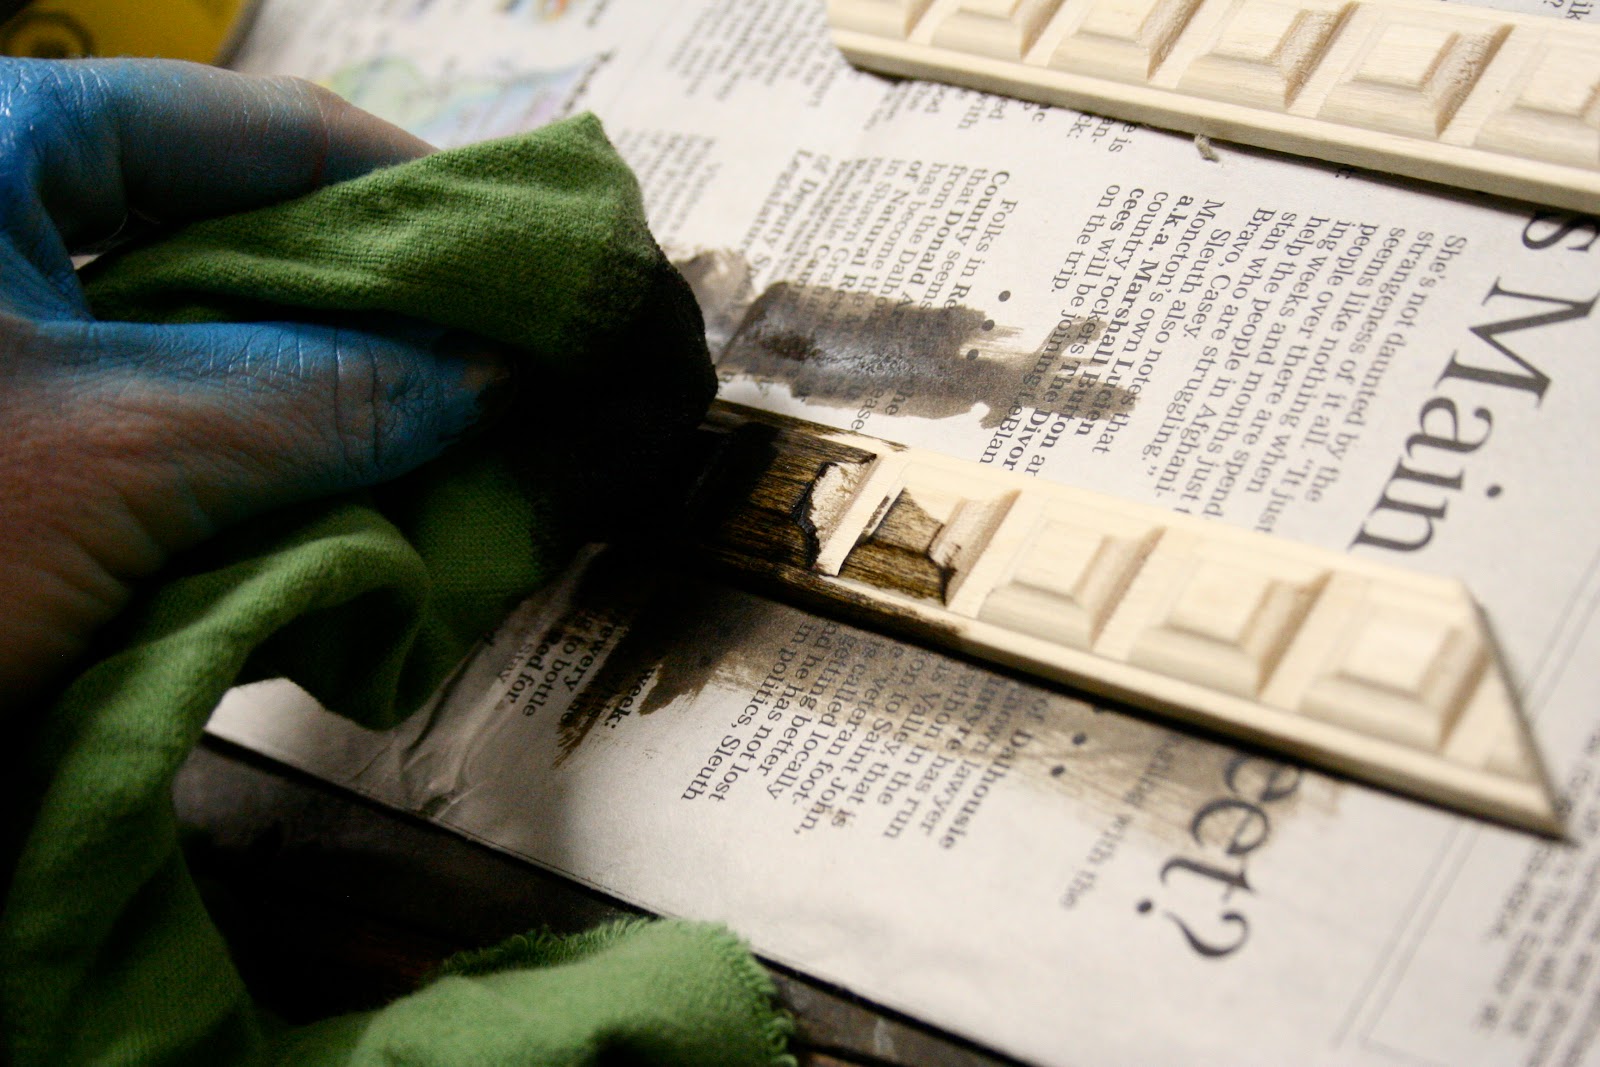
I used a clean rag to apply the stain, which I did twice until I was happy with the color.
Once everything was dry we put it all together. TC used wood glue to attach the molding, then clamped it down until it dried completely. I then screwed each knob into the board. Finally, TC attached a hook to the back so Marissa will be able to hang it on the wall.

Done! Easy as pie. Okay, it's only easy if you 1. have a saw 2. know how to use a saw or 3. have a friend with a saw that knows how to use and loves you enough to do a little cutting.
But really, relatively simple and totally affordable. Can you imagine all the color combinations you could do? The cabinet knob combos? Vertical. Diagonal. High. Low. Drawn. Fabric'd. The possibilities are endless.
Here's a photo of it actually hanging in her bathroom:

So just in case you too have a bunch of homeless necklaces, I thought I'd throw an idea out there.
OMG! that is gorgeous. Bravo Kate!!!
ReplyDelete-Chris :)